Professional ceiling painting helps improve interior lighting, makes merchandise and equipment easier to see, and creates a more professional appearance in retail, business, and industrial facilities. Ceiling Painter Wilmington will ensure the job is done right with proper surface preparation, masking, and covering.
Painting the ceiling often requires standing on a ladder for an extended period. Follow these tips to get the perfect painted ceiling you deserve.
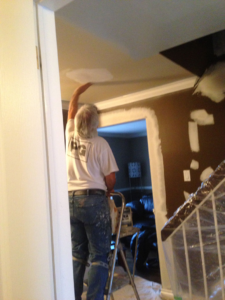
Before painting the ceiling, make sure that you’re prepared. This includes having the right equipment and ensuring that you’re comfortable working on a ladder for extended periods of time. It’s also important to cover furniture, light fixtures, and anything else that you don’t want to get paint on.
It’s also recommended that you prime the ceiling, especially if it has stains or is already painted a dark color. This helps the new coat of paint to adhere better, and it can help hide any imperfections on the ceiling.
Choose a high-quality interior latex primer, and use it as instructed. If your ceiling is very rough or has a deep texture, you might need to use a high-build primer instead of the normal one.
Once the primer is dry, it’s time to start the actual painting. Start by using a brush to “cut in” the edges where the ceiling meets the walls. This will ensure that the roller doesn’t miss any spots. Then, switch to a roller and begin rolling the main area of the ceiling. Make sure that you’re using a roller designed for ceilings, or at least an interior latex with a high viscosity (usually measuring in Krebs Units, KU).
Roll one section at a time, without pausing between sections. This will help you achieve a consistent roller texture, and prevent patchiness and picture framing (the difference between brushed and rolled areas). It’s also a good idea to use the same laying-off technique that you used when priming.
Finally, make sure that you’re using a roller nap of 10-18mm. Any less will not deliver enough paint, and any more will create an uneven finish.
When you’re finished, take a moment to inspect your work for any imperfections that might need to be touched up. Be sure to clean your brushes and roller immediately, using warm water for water-based paints or a solvent for oil-based paints.
A good primer can hide stains, smooth a rough surface and improve the durability of paint. It is especially important for the ceiling, where a slicker paint may not hold up to moisture or humidity. There are many different types of primers on the market, and it is best to use a product that is designed specifically for ceilings.
A low-VOC advanced water-base formula that delivers premium performance for drywall and textured ceilings, including popcorn style. It seals water stains and other household stains, hides imperfections and is mildew resistant. It also contains a built-in stain blocker to help prevent bleed-through of dark colors over light stains or stains from previous water damage. This product can be used as a primer, sealer and topcoat for new or previously painted drywall, plaster, wood, acoustic popcorn ceilings and painted metal.
It goes on pink to make it easier to identify missed or skipped spots, but dries to a bright white finish that is mildew resistant and easy to clean. Use only when air, material and surface temperatures are between 50-90oF (10-32oC) and the relative humidity is below 85%. Stir paint thoroughly and intermix containers to ensure uniform color and sheen. Apply with a high quality roller cover, nylon or polyester brush or an airless sprayer.
After washing the ceiling, it is important to let it dry completely before priming and painting. A slicker paint will not hold up to moisture or humidity, and it can lead to cracking, peeling, flaking, blistering and staining of the underlying surface. It is also important to use a high-quality roller cover that has a nap (thickness) that is appropriate for the texture of the ceiling.
The last step in preparation before painting is to apply a coat of primer. This can be a stain-blocking primer, but it can also be a simple white shellac-based primer. It can be brushed or sprayed, and it helps to protect the underlying drywall and to help mask odors from smoking or cooking in the room.
Stain-blocking primer can also be applied to the walls before painting, but it is more commonly used on the ceiling. It can help to cover stains or dinginess from roof leaks, spills and smoke damage that are difficult to conceal with a standard latex interior wall paint.
Cutting in when painting is the process of creating a line where a wall meets the ceiling. It can be tricky, but it is necessary if you want to create a nice, straight paint line. Many beginners struggle with this, but with a little practice it becomes easy.
If you are new to painting, it’s a good idea to apply some tape to the area you are planning to paint. This will help you to get a straighter line without having to go back and redo it later. It will also prevent any bleed under the paint that could occur after it has dried.
It’s also a good idea to use a different color of paint for the ceiling than you will be using on the walls. This will help to hide any mistakes that may happen during the cutting process. It’s also a good idea to choose a high-quality paint that will be formulated for ceilings, as it will be more durable than a regular wall-painting brand.
When cutting in, it is important to work slowly and carefully. If you rush it, you are likely to make mistakes that will show up when the paint dries. If you are nervous about your ability to do a good job, it may be helpful to ask a professional for advice.
One of the most difficult parts of cutting in is painting around corners. It’s important to start the brush a few inches away from the corner and then gently wiggle it in to help spread the paint. Once you have a few inches of paint on the corner, you can begin to move towards the line you are trying to make.
Another challenge is painting the line where a textured ceiling meets a smooth surface. If you try to paint it straight on, you will most likely get paint on the ceiling. Tape doesn’t always work, so it may be necessary to knock off the texture with a putty knife and then sand the edges to remove any bumps.
If you are painting on a ladder, it’s a good idea to transfer your paint into a smaller bucket or a plastic cup. This will prevent you from overfilling your brush and making a thick line of paint. If you are using a roller, it is also a good idea to lap the paint onto the walls a bit. This will help to hide any brush marks and will give the room a more finished look.
After prepping the ceiling, it’s time to start painting. Professional painters typically spray ceilings rather than brushing them, which can save both time and money as well as create a more uniform finish. If you want to save money and get a good result, consider renting a sprayer yourself or hiring a pro with one.
Before starting the actual painting, make sure your ladder is secure and that you’re comfortable using it. The process of painting a ceiling requires frequent reaches over your head which puts a lot of stress on your shoulders, arms and neck. Investing in a quality ladder is essential. If you have to rent a ladder, be sure to check the safety straps and test it for stability before use.
When working on a ceiling, it’s important to take your time and not rush. This will ensure a smooth, even coat that looks professional. It also helps prevent splatters, which can be very difficult to touch up later.
Ideally, you should paint the ceiling before the walls to avoid any splatters from the roller making their way onto the wall or crown molding. However, if you’re painting a room in a dramatic contrasting color, it may be easier to paint the walls first and then move on to the ceiling.
To help prevent permanent roller marks, work in 3 foot by 3 foot sections. This will give you enough space to keep track of the area you’ve already painted. When you’re ready to move on, make sure each new section overlaps with the wet edge of the previous section. This will help blend the sections and eliminate any visible roller marks.
When choosing a roller, be sure to choose the right size and texture for your ceiling. For smooth ceilings, a low-nap roller works best; for textured ceilings, you’ll need a 3/4 inch nap roller. Having the right tools will also make your job easier. A plastic cup or small paint bucket is much easier to carry up and down a ladder than a full gallon of paint. You can also buy a paint tray liner, which eliminates the need to clean your paint tray between colors.